
Continuous test execution is an essential part of automation testing, especially in regression run. If you need to start execution manually means your return on investment is not as good as needed. There are multiple ways to do this. Developers in many companies use Continuous Integration (CI) tool like Hudson, Rational Team Concert for building application multiple times in a day where codes are checked in from multiple locations. You can use the same feature of building application to perform testing as well. You can build your own in-house application to perform the same task. I will give an idea for the same at the end of the blog.
I use WebDriver for automation testing in .NET framework. I heard that many companies use Jenkins for CI and even for testing so thought to implement my tests written in C#. After some research on the internet, I was able to implement a basic skeleton for continuous testing. In order to understand and to customize Jenkins, we will go Step by Step.
- Download Jenkins.
- Run and verify Jenkins.
- Install as a Window Service.
- Configure Jenkins as a slave. (Optional. Read only if you want to learn.)
- Create Job to execute the test.
1. Download Jenkins:
In order to download Jenkins, Go to http://jenkins-ci.org/ and download ‘Latest and greatest’ version of Java web archive (.war) file and save it to some location.
2. Run And Verify Jenkins:
Open Command window and navigate to the location where you have downloaded *.war file. Execute following command (I saved Jenkins.war file in D drive)
- Java –jar Jenkins.war
You will see following output
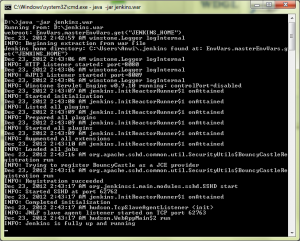
If you read all lines you will see that HTTP Listeners started at port 8080.
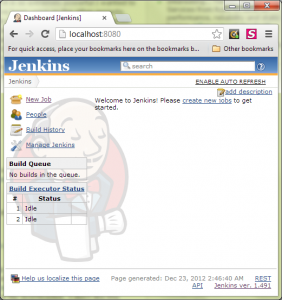
- Open Browser and open http://localhost:8080/ you should get the following page loaded.
3. Install Jenkins as Window Service:
Node: If you install as window service, your tests will run in the background.
Perform Step 2 if not yet done. Click ‘Manage Jenkins’ you will see the following screen with various option.
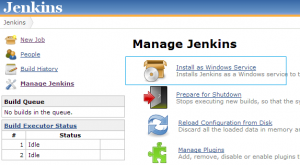
Click on ‘Install as Windows Service link. You will see the following screen.
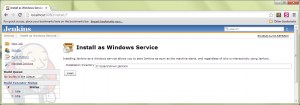
Click on Install button. Once installation complete you will see following:

Go to Window Services and verify if you can see there or not.  For now, you will not require starting Jenkins site on the command line. You can directly start http://localhost:8080/ if your Jenkins service is running. NOTE: if you are using only window OS then you can directly install native package from http://jenkins-ci.org/
  You need to unzip the folder and install MSI file. That will install and get ready for step 3.
4. Configure Jenkins as a Slave:
This is most interesting part of Jenkins. Here you can configure your slave attached to Master which is ready for step 3. You can assign tasks to various slave to perform like test execution etc. Start Jenkins Website and click on the link ‘Manage Jenkins’. You will see following option among various other options.  Click on the above option which will take you to the following screen.
 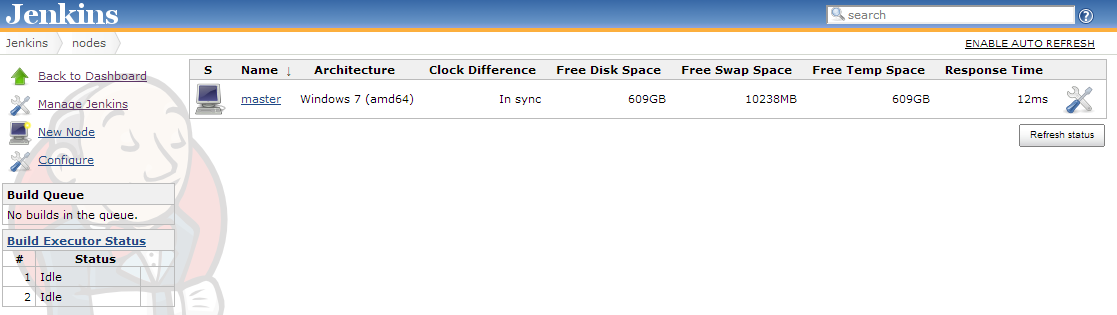 Now you need to create Node that connected to master (Just like GRID (HUB-NODE)). To do that you need to click on ‘New Node’ link that should you to following screen.
 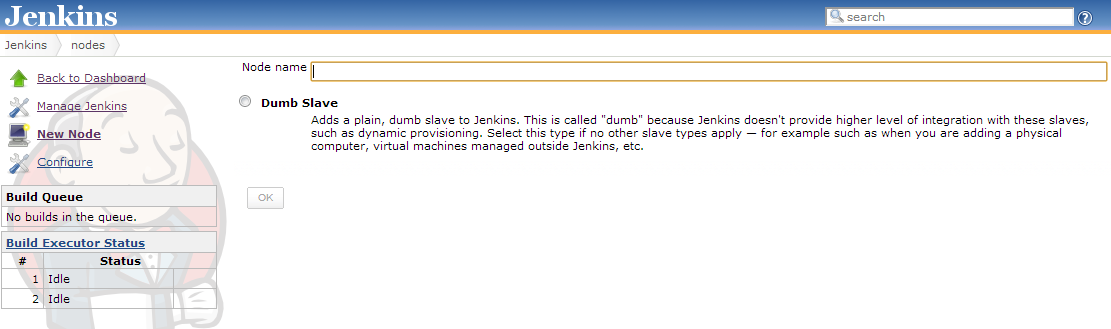 Give some Name of Node and Click on Dumb Slave radio button that will activate the OK button. Click on OK button. This will take you to the following screen.
 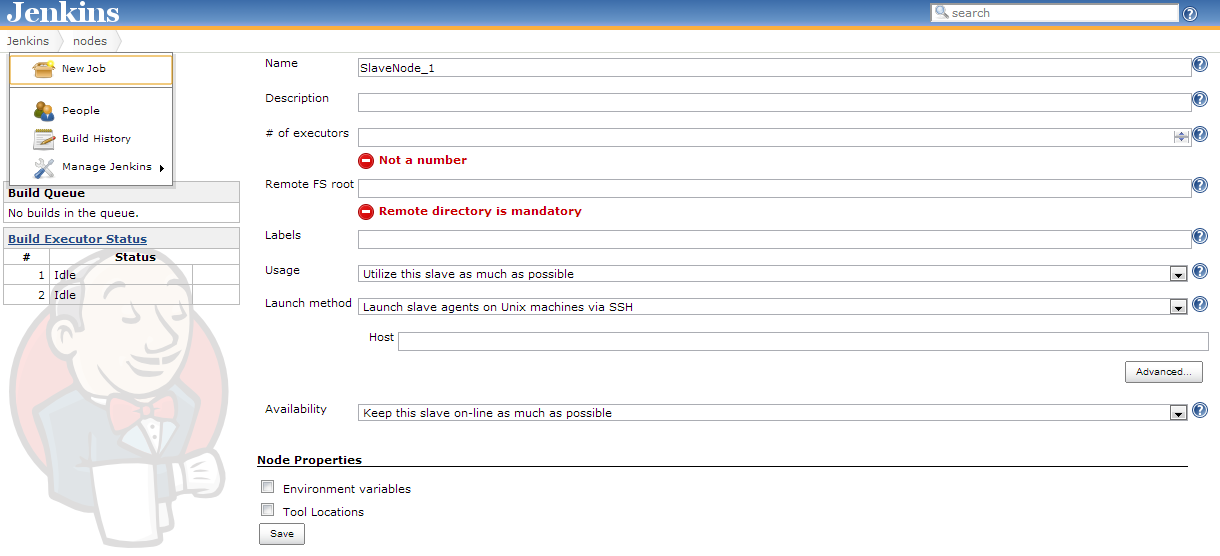 You can click on Help icon to
![]() understand more about the fields. I am giving following options # of executor: 1, Remote FS root: D:\Shared. Launch method: Save this. It will take you the following screen.
understand more about the fields. I am giving following options # of executor: 1, Remote FS root: D:\Shared. Launch method: Save this. It will take you the following screen. 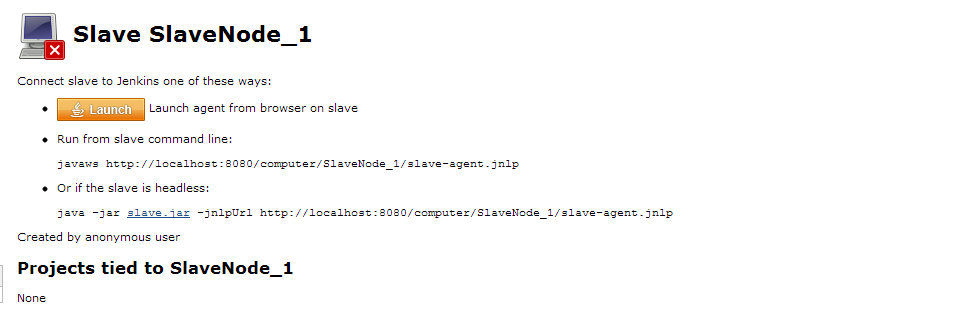 As you can see above, you can start that node by given three options. It is up to you, to choose but I prefer the first option. Click on the Orange button with Launch. This will ask you to download slave-agent.jnlp. Please save this to the location where you have created your slave i.e. D:\Slave. Open command prompt and change directory to the location where you have saved this file and execute following command Javaws slave-agent.jnlp after some processing you may see following windows:
  This will disappear in few seconds and you will see Jenkins slave Agent screen with ‘Connected’ text on the screen.
 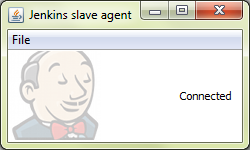 If you go back to Jenkin site and refresh the page in Manage Node screen, you will see the following screen.
 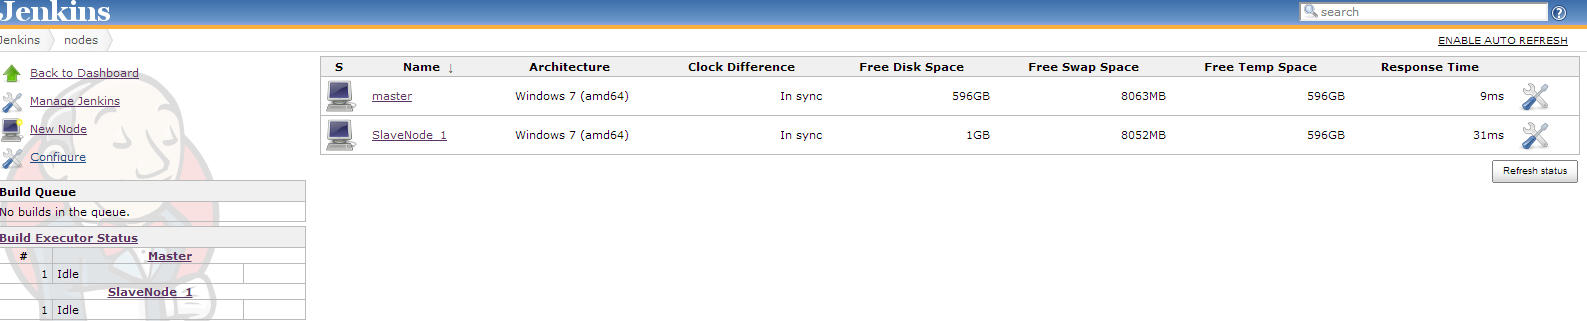 You can install this slave into the machine as window services using File menu given in ‘Jenkin salve agent’ screen so in future you will not require doing the whole process of starting slave via jlnp
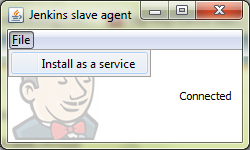
 Click ‘OK’. This may ask your permission to run the program.
 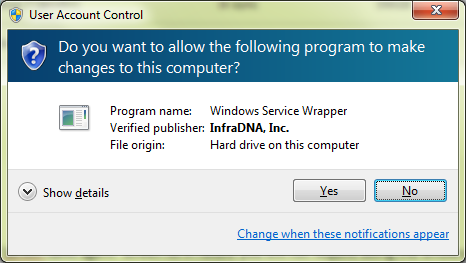 Will see that Jenkins slave agent window disappear and if you check in ‘services’ you will be able to see slave as services.
 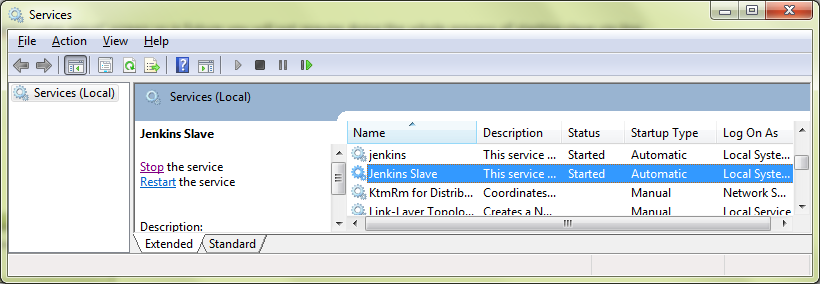 Go back to Jenkins site and Click on slave link the page and make sure that you can see slave running.
 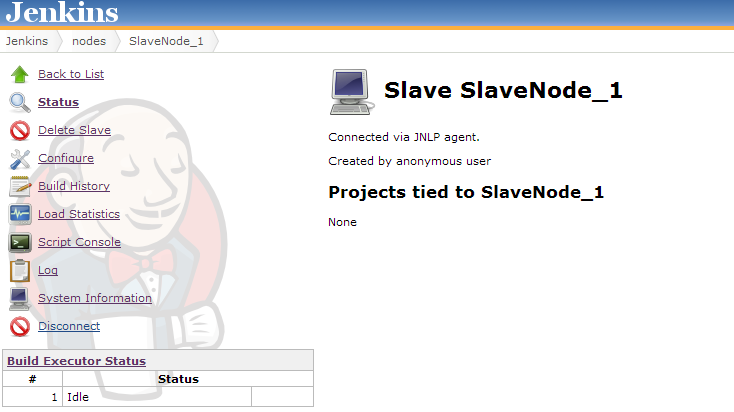 Now your slave is connected to your master and ready to serve you for execution by added execution job assigned by you as given in next section.
5. Create JOB to Execute Test:
Once your slave node is running, go to home page of Jenkins and click on ‘New Job’. 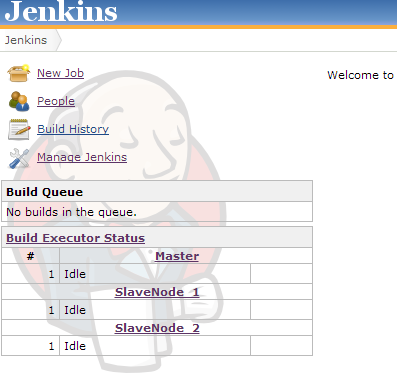 This will take you to the following window. Provide Job name as per your choice and select radio button. ‘Build a free-style software project’. And hit OK.
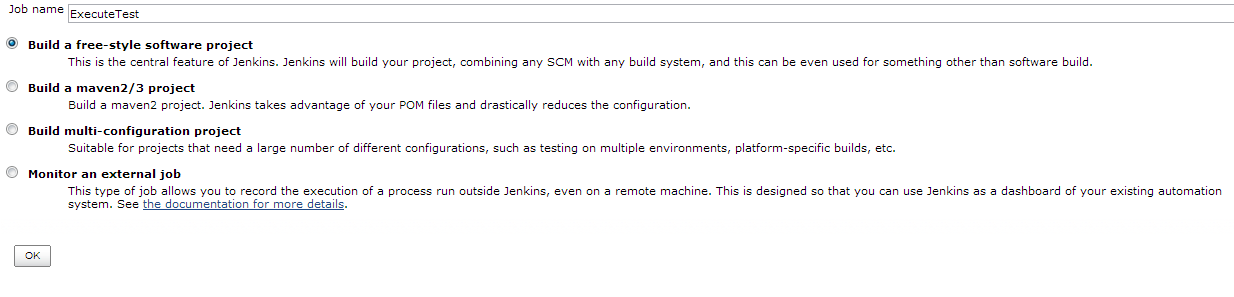
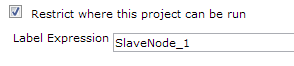
This will take you the detailed screen and you can fill information as you needed. Few points are very important which you should consider.
- Execute test at specific Node.
2. Regression Run repletion :
How frequent you want to execute the test.
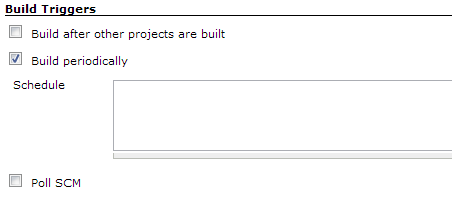
There are various commands you can give to select the frequency of test execution ie. Every hour or at every day at some specific time frame. You can Google the commands or I can write a separate article about this if needed.
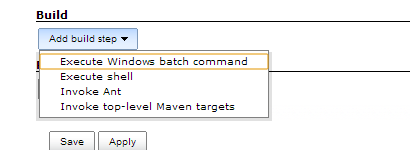
3. Execute Tests from various options (batch command preferred at least in my case)
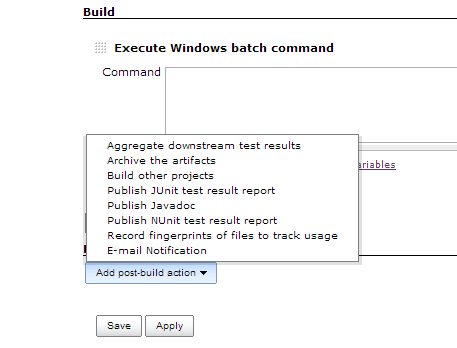
4. Post Execution:
Configure to send email or prepare report as NUnit/Junit repot etc.
Once you save this job this will take you to the following screen.
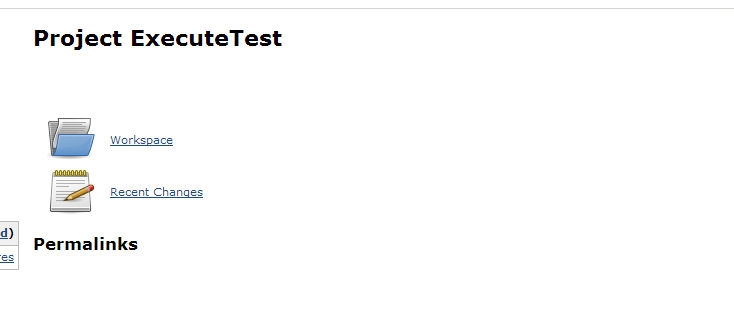
Click on [Back to Dashboard] link that will take you the following screen.

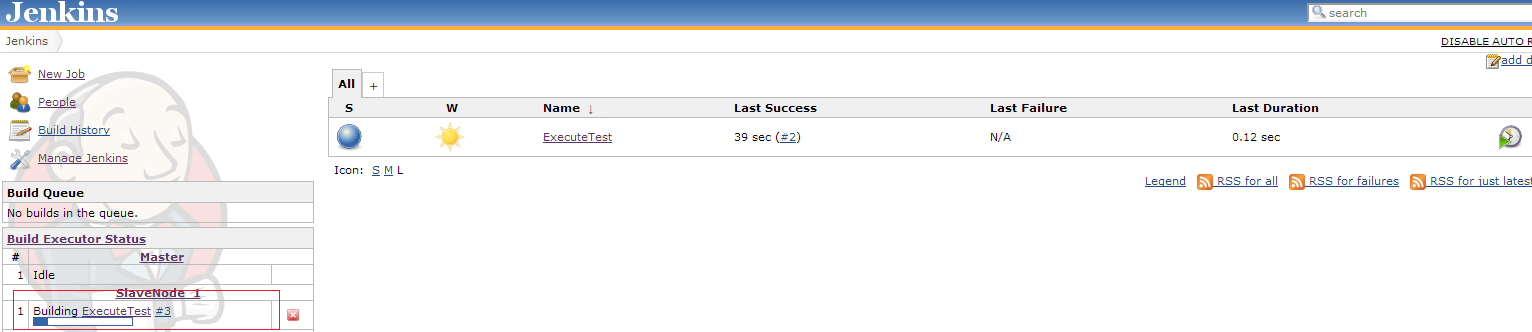
To execute test you can click on.![]() You will see the following screen.
You will see the following screen.
I think much detail covers the basic understanding of Jenkins configuration for test execution. I hope this will give you are the direction to configure Jenkins in your project. I use Webdriver in .NET environment and configure Jenkins for continuous execution and it was successful implementation but later we decided to build our own internal application to specific for our own application which can do continuous execution and other tasks as well which is not possible via Jenkins like customized internal website with customized graph and tables but that’s another story.
I am going to write another article specifically how to execute tests using MSBuild, msTest and Nunit and another article for JUnit.
It is possible to specify what tests have to be started for an certain build ?
To give you an example, if my project contain 100 files but for the current build only 10 files were modified, I need to run only the tests related to those 10 files and not all the tests.
Hi Gabriel,
Thanks for visiting the blog!
For the question you asked, you can use Run Condition Plugin.
Ref: https://wiki.jenkins-ci.org/display/JENKINS/Run+Condition+Plugin
You can put the condition to the run the specific tests only.
Getting error as [SSH] Opening SSH connection to :22.
ERROR: Failed to authenticate as jenkins. Wrong password. (credentialId:4af42382-5f62-4141-ba2d-d37e33ac986f/method:keyboard-interactive)
[09/09/14 15:45:32] [SSH] Authentication failed.
hudson.AbortException: Authentication failed.
at hudson.plugins.sshslaves.SSHLauncher.openConnection(SSHLauncher.java:1143)
at hudson.plugins.sshslaves.SSHLauncher$2.call(SSHLauncher.java:648)
at hudson.plugins.sshslaves.SSHLauncher$2.call(SSHLauncher.java:642)
at java.util.concurrent.FutureTask.run(FutureTask.java:262)
at java.util.concurrent.ThreadPoolExecutor.runWorker(ThreadPoolExecutor.java:1145)
at java.util.concurrent.ThreadPoolExecutor$Worker.run(ThreadPoolExecutor.java:615)
at java.lang.Thread.run(Thread.java:744)
[09/09/14 15:45:32] [SSH] Connection closed.
[09/09/14 15:45:32] Launch failed – cleaning up connection
Try this:
https://issues.jenkins-ci.org/browse/JENKINS-6714
Hi,
Just a small confirmation.We can use Jenkins for selenium webdriver C# testcases right.As i have searched net but could not get clear information whether jenkins can be used for C#.Can you please confirm.
Thanks in advance,
Vani
hi Vani,
You can run selenium testing written in C# suing command line. Once you are able to run them, you can use the same command using jenkins. Let me know if you able to run your test. if not then let me know.
Hi Aditya,
I am very new on jenkins and want know how to setup testing job for my web application.
I am able to build my web project which is developed in asp.net, classic ASP and back-end as SQL server.
To run this project we host website into IIS.
I want to execute some basic test for this application through Jenkins. Please help me to understand how we can setup basic testing for web application which require IIS. Please show me example like this blog. I don’t know what plugin I should use. Please help.
How to do integration with server based jenkins(which one present in Linux platform) to selenium codes, those are available in stash repository).
Hi Debasish,
Did you try https://wiki.jenkins-ci.org/display/JENKINS/BitBucket+Plugin?
can you send me the link of how to execute tests using msbuild, msTest and Nunit and another article for JUnit.
Hi Aditya,
i have few queries related to my project , We have BAT concept (build Acceptance Testing) , We usually get the build once or twice a week , there is a separate dedicated team for that , They deploy the latest builds on Manual , Automation and Performance testing servers . So post this build on Automation Servers , we need to execute some BAT scripts which verifies Crud operations , Hardly there are 20-30 test cases . We run this suit of BAT Scripts through automation Simply by selecting the suit and selecting environments(Schemas) and Run . I want this to be done automatically … So could you please help me with this , Below are my requirements
1) Need to run the BAT scripts automatically as soon as the build is deployed to Automation Server completely
2) How this things can be achieved ?
We are using below technologies
Selenium Web Driver , C# , Visual Studio , tortoise SVN , MB Unit Framework
Hi Mandar,
Thanks for reaching us. Did you try CORN Operation (https://en.wikipedia.org/wiki/Cron#CRON_expression) with jenkins?
http://stackoverflow.com/questions/12472645/how-to-schedule-jobs-in-jenkins
My personal approach would be first try to find a way how can I run all these test online. Once I that command then move that command into ***.bat file and then schedule this job in Jenkins.
Refer(https://wiki.jenkins-ci.org/display/JENKINS/Schedule+Build+Plugin)
Let me know if that is helps? Else reach me on [email protected], We can talk more in detail about your issue and see if we can solve or not.
Hi,
I pulled Selenium maven project from gitHub, and build and run from jenkins, Execution working excellent but browser activity is not displayed. I searched but didn’t get solution, could you please help me.
ii run test in windows firefox, but jenkins give me the following error:
Unable to connect to host 127.0.0.1 on port 7055 after 45000 ms. Firefox console output:
ox\\browser\\extensions\\{972ce4c6-7e08-4474-a285-3208198ce6fd}.xpi”,”installDate”:1262300400000,”updateDate”:1262300400000,”applyBackgroundUpdates”:1,”skinnable”:true,”size”:22012,”sourceURI”:null,”releaseNotesURI”:null,”softDisabled”:false,”foreignInstall”:false,”hasBinaryComponents”:false,”strictCompatibility”:true,”locales”:[],”targetApplications”:[{“id”:”{ec8030f7-c20a-464f-9b0e-13a3a9e97384}”,”minVersion”:”47.0.1″,”maxVersion”:”47.0.1″}],”targetPlatforms”:[],”seen”:true}
1491833617073 addons.xpi DEBUG getModTime: Recursive scan of {972ce4c6-7e08-4474-a285-3208198ce6fd}
1491833617074 DeferredSave.extensions.json DEBUG Save changes
1491833617075 addons.xpi DEBUG Updating database with changes to installed add-ons
1491833617075 addons.xpi-utils DEBUG Updating add-on states
1491833617076 addons.xpi-utils DEBUG Writing add-ons list
1491833617078 addons.xpi DEBUG Registering manifest for C:\Program Files (x86)\Mozilla Firefox\browser\features\[email protected]
1491833617079 addons.xpi DEBUG Calling bootstrap method startup on [email protected] version 1.0
1491833617079 addons.xpi DEBUG Registering manifest for C:\Program Files (x86)\Mozilla Firefox\browser\features\[email protected]
1491833617080 addons.xpi DEBUG Calling bootstrap method startup on [email protected] version 1.0.2
1491833617082 addons.xpi DEBUG Registering manifest for C:\Program Files (x86)\Mozilla Firefox\browser\features\[email protected]
1491833617083 addons.xpi DEBUG Calling bootstrap method startup on [email protected] version 1.3.2
1491833617116 addons.manager DEBUG Registering shutdown blocker for XPIProvider
1491833617117 addons.manager DEBUG Provider finished startup: XPIProvider
1491833617117 addons.manager DEBUG Starting provider: LightweightThemeManager
1491833617117 addons.manager DEBUG Registering shutdown blocker for LightweightThemeManager
1491833617117 addons.manager DEBUG Provider finished startup: LightweightThemeManager
1491833617118 addons.manager DEBUG Starting provider: GMPProvider
1491833617128 addons.manager DEBUG Registering shutdown blocker for GMPProvider
1491833617129 addons.manager DEBUG Provider finished startup: GMPProvider
1491833617129 addons.manager DEBUG Starting provider: PluginProvider
1491833617129 addons.manager DEBUG Registering shutdown blocker for PluginProvider
1491833617129 addons.manager DEBUG Provider finished startup: PluginProvider
1491833617130 addons.manager DEBUG Completed startup sequence
1491833617604 addons.manager DEBUG Starting provider:
1491833617604 addons.manager DEBUG Registering shutdown blocker for
1491833617605 addons.manager DEBUG Provider finished startup:
Crash Annotation GraphicsCriticalError: |[0][GFX1-]: [D3D11] create swap chain failed: 0x887a0022, 0 (t=11.6273) [GFX1-]: [D3D11] create swap chain failed: 0x887a0022, 0
1491833617878 DeferredSave.extensions.json DEBUG Write succeeded
1491833617879 addons.xpi-utils DEBUG XPI Database saved, setting schema version preference to 17
1491833617879 DeferredSave.extensions.json DEBUG Starting timer
1491833617895 addons.repository DEBUG No addons.json found.
1491833617896 DeferredSave.addons.json DEBUG Save changes
1491833617900 DeferredSave.addons.json DEBUG Starting timer
1491833617938 addons.manager DEBUG Starting provider: PreviousExperimentProvider
1491833617938 addons.manager DEBUG Registering shutdown blocker for PreviousExperimentProvider
1491833617939 addons.manager DEBUG Provider finished startup: PreviousExperimentProvider
1491833617942 DeferredSave.extensions.json DEBUG Starting write
1491833617967 DeferredSave.addons.json DEBUG Starting write
1491833618016 DeferredSave.extensions.json DEBUG Write succeeded
1491833618031 DeferredSave.addons.json DEBUG Write succeeded
Crash Annotation GraphicsCriticalError: |[0][GFX1-]: [D3D11] create swap chain failed: 0x887a0022, 0 (t=11.6273) |[1][GFX1-]: [D3D11] create swap chain failed: 0x887a0022, 0 (t=20.9973) [GFX1-]: [D3D11] create swap chain failed: 0x887a0022, 0
Command duration or timeout: 46.02 seconds
Build info: version: ‘2.53.1’, revision: ‘a36b8b1cd5757287168e54b817830adce9b0158d’, time: ‘2016-06-30 19:26:09’
System info: host: ‘sesjknboa01’, ip: ‘127.0.0.1’, os.name: ‘Linux’, os.arch: ‘amd64’, os.version: ‘3.10.0-514.6.1.el7.x86_64’, java.version: ‘1.7.0_07’
Driver info: org.openqa.selenium.remote.RemoteWebDriver
Caused by: org.openqa.selenium.remote.ErrorHandler$UnknownServerException:
Unable to connect to host 127.0.0.1 on port 7055 after 45000 ms. Firefox console output:
ox\\browser\\extensions\\{972ce4c6-7e08-4474-a285-3208198ce6fd}.xpi”,”installDate”:1262300400000,”updateDate”:1262300400000,”applyBackgroundUpdates”:1,”skinnable”:true,”size”:22012,”sourceURI”:null,”releaseNotesURI”:null,”softDisabled”:false,”foreignInstall”:false,”hasBinaryComponents”:false,”strictCompatibility”:true,”locales”:[],”targetApplications”:[{“id”:”{ec8030f7-c20a-464f-9b0e-13a3a9e97384}”,”minVersion”:”47.0.1″,”maxVersion”:”47.0.1″}],”targetPlatforms”:[],”seen”:true}
1491833617073 addons.xpi DEBUG getModTime: Recursive scan of {972ce4c6-7e08-4474-a285-3208198ce6fd}
1491833617074 DeferredSave.extensions.json DEBUG Save changes
1491833617075 addons.xpi DEBUG Updating database with changes to installed add-ons
1491833617075 addons.xpi-utils DEBUG Updating add-on states
1491833617076 addons.xpi-utils DEBUG Writing add-ons list
1491833617078 addons.xpi DEBUG Registering manifest for C:\Program Files (x86)\Mozilla Firefox\browser\features\[email protected]
1491833617079 addons.xpi DEBUG Calling bootstrap method startup on [email protected] version 1.0
1491833617079 addons.xpi DEBUG Registering manifest for C:\Program Files (x86)\Mozilla Firefox\browser\features\[email protected]
1491833617080 addons.xpi DEBUG Calling bootstrap method startup on [email protected] version 1.0.2
1491833617082 addons.xpi DEBUG Registering manifest for C:\Program Files (x86)\Mozilla Firefox\browser\features\[email protected]
1491833617083 addons.xpi DEBUG Calling bootstrap method startup on [email protected] version 1.3.2
1491833617116 addons.manager DEBUG Registering shutdown blocker for XPIProvider
1491833617117 addons.manager DEBUG Provider finished startup: XPIProvider
1491833617117 addons.manager DEBUG Starting provider: LightweightThemeManager
1491833617117 addons.manager DEBUG Registering shutdown blocker for LightweightThemeManager
1491833617117 addons.manager DEBUG Provider finished startup: LightweightThemeManager
1491833617118 addons.manager DEBUG Starting provider: GMPProvider
1491833617128 addons.manager DEBUG Registering shutdown blocker for GMPProvider
1491833617129 addons.manager DEBUG Provider finished startup: GMPProvider
1491833617129 addons.manager DEBUG Starting provider: PluginProvider
1491833617129 addons.manager DEBUG Registering shutdown blocker for PluginProvider
1491833617129 addons.manager DEBUG Provider finished startup: PluginProvider
1491833617130 addons.manager DEBUG Completed startup sequence
1491833617604 addons.manager DEBUG Starting provider:
1491833617604 addons.manager DEBUG Registering shutdown blocker for
1491833617605 addons.manager DEBUG Provider finished startup:
Crash Annotation GraphicsCriticalError: |[0][GFX1-]: [D3D11] create swap chain failed: 0x887a0022, 0 (t=11.6273) [GFX1-]: [D3D11] create swap chain failed: 0x887a0022, 0
1491833617878 DeferredSave.extensions.json DEBUG Write succeeded
1491833617879 addons.xpi-utils DEBUG XPI Database saved, setting schema version preference to 17
1491833617879 DeferredSave.extensions.json DEBUG Starting timer
1491833617895 addons.repository DEBUG No addons.json found.
1491833617896 DeferredSave.addons.json DEBUG Save changes
1491833617900 DeferredSave.addons.json DEBUG Starting timer
1491833617938 addons.manager DEBUG Starting provider: PreviousExperimentProvider
1491833617938 addons.manager DEBUG Registering shutdown blocker for PreviousExperimentProvider
1491833617939 addons.manager DEBUG Provider finished startup: PreviousExperimentProvider
1491833617942 DeferredSave.extensions.json DEBUG Starting write
1491833617967 DeferredSave.addons.json DEBUG Starting write
1491833618016 DeferredSave.extensions.json DEBUG Write succeeded
1491833618031 DeferredSave.addons.json DEBUG Write succeeded
Crash Annotation GraphicsCriticalError: |[0][GFX1-]: [D3D11] create swap chain failed: 0x887a0022, 0 (t=11.6273) |[1][GFX1-]: [D3D11] create swap chain failed: 0x887a0022, 0 (t=20.9973) [GFX1-]: [D3D11] create swap chain failed: 0x887a0022, 0
Build info: version: ‘2.53.1’, revision: ‘a36b8b1cd5757287168e54b817830adce9b0158d’, time: ‘2016-06-30 19:26:09’
System info: host: ‘sesjknboa01’, ip: ‘127.0.0.1’, os.name: ‘Linux’, os.arch: ‘amd64’, os.version: ‘3.10.0-514.6.1.el7.x86_64’, java.version: ‘1.7.0_07’
Driver info: driver.version: FirefoxDriver
Thank you a lot for the super article.Highly reccomend!