
Today’s applications are all about platform first. Every company builds on API so the developer can use the platform to build a new and enhanced product. There are several tools are available in the market for doing API Testing but these are either expensive or too complex to do for the programmer. That is why nowadays companies are hiring testers cum developers. The number of Manual testing positions is diminishing slowly. There is a huge demand for testers if you can do API Testing as well. The expectation is not using the off-the-shelf tool but using programming code. I think it is the right time for manual testers to start learning the basics of programming and learning API Testing. To write API tests using code doesn’t require much coding skills like writing software.
This tutorial is primarily focused on writing API tests using C#. I am not going to write any fancy API Testing framework but give you guidance, how a non-developer can write API testing in no time.
Project-Under-Test:
I am going to use MailChimp Platform and test their API. Let’s Start.
- Setup Visual Studio on Windows.
- Setup Visual Studio on Mac.
- Create an account in Application-Under-Test.
- Design a basic API Test Scenario.
- Write API Testing Code.
Setup Visual Studio on Mac.
If you are using a Mac, you need to install .NET 2.0. .NET Core 2.x is supported on the macOS 10.12 “Sierra” and later versions. .NET core dependencies can be installed from https://www.microsoft.com/net/download/macos
Microsoft suggested that the default open file limit on macOS may not be sufficient for some .NET Core workloads, such as restoring projects or running unit tests. To avoid this you can run the following command on terminal
echo ‘ulimit -n 2048’ | sudo tee -a /etc/profile
Make sure you reboot your Mac to get changes in effect
Visual Studio Editor:
You can use an editor of your choice but Microsoft provided a powerful tool for your C# cording. That you install from the following link:
https://docs.microsoft.com/en-us/visualstudio/mac/installation
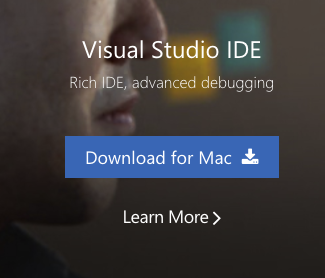
- Click on https://www.visualstudio.com/ and click on Download for Mac button and select Community version of Visual Studio.
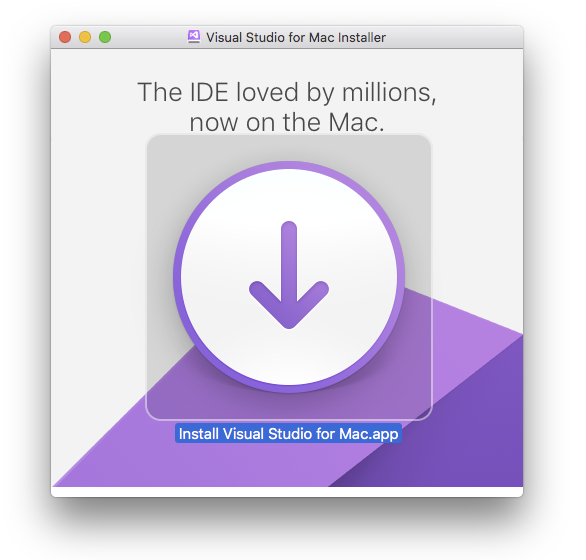
2. Once VisualStudioForMacInstaller.dmg has downloaded, click dmg file to install. You will see the following screen.
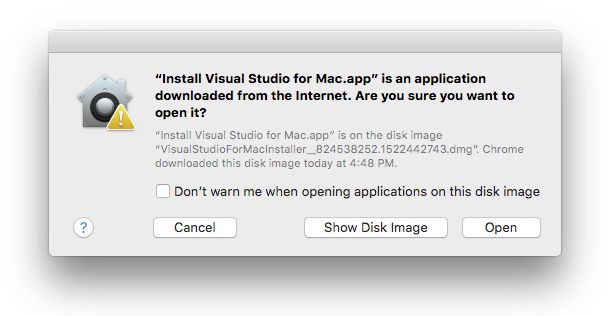
3. You might see a prompt to ask your permission to open the file. In that case, click on the Open button.
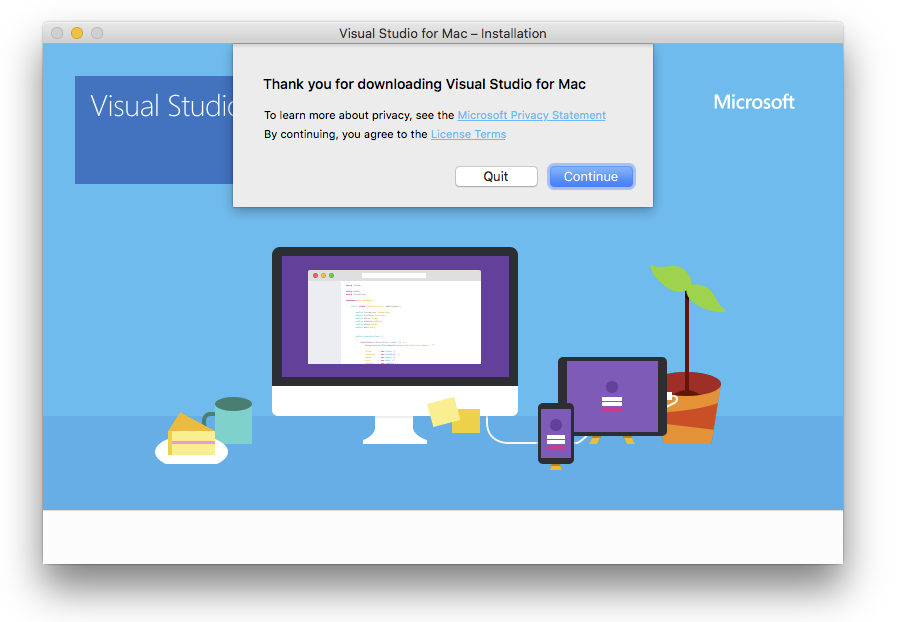
4. The install will verify if any dependent components need to be updated or installed.

5. Press the Continue button to acknowledge the terms:
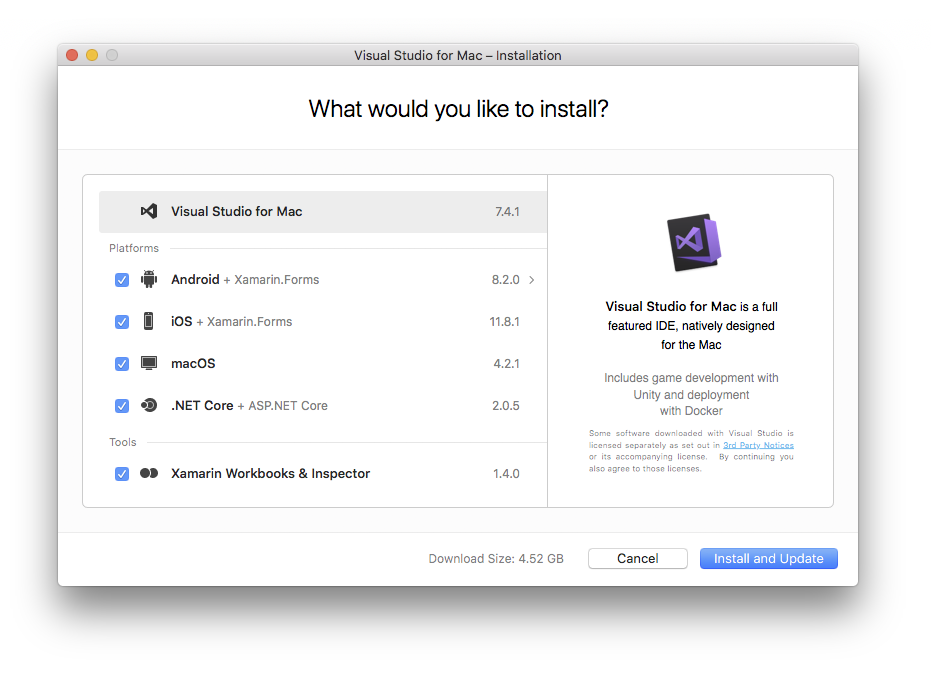
6. Once you click on Continue, you get options to install various platforms and tool that you may need. for the current use case, you do not need more than .NET but you can use all default selected and click ‘Install and Update’ button.
7. The installer will start downloading apps and proceed to install them.
Create an account in Application-Under-Test
For our API Testing, we are not going to write new API, etc. But we are going to use an existing application API. You can choose any API of your choice but for this tutorial including facebook, flicker, we will be using MailChimp. MailChimp is a marketing automation platform and an email marketing service. They are providing freemium account so you can use that application for your personal use too. They also provided very nice and clear documentation for their API. Knowing the fact that we are going to use the production account, chances are high that we will not find any bug. But you never know :).
Sign up for a free account in MailChimp using the following link. https://login.mailchimp.com/signup/
Once you are done with account creation and verification, search for the keyword, ‘Mailchimp API Documentation’ using your favorite search engine. You can easily figure out the link to the API documentation for MailChimp. You can do the same thing if you are using some other API but the concept is the same for any application, is to find API documentation. For our application under test, URL is https://developer.mailchimp.com/
at the time of writing this article. You can go to documentation to see the detail description for each route and needed parameter or payloads.
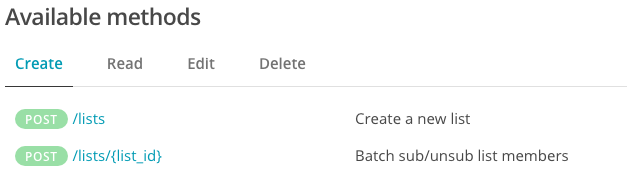
This blog will focus on the list only. 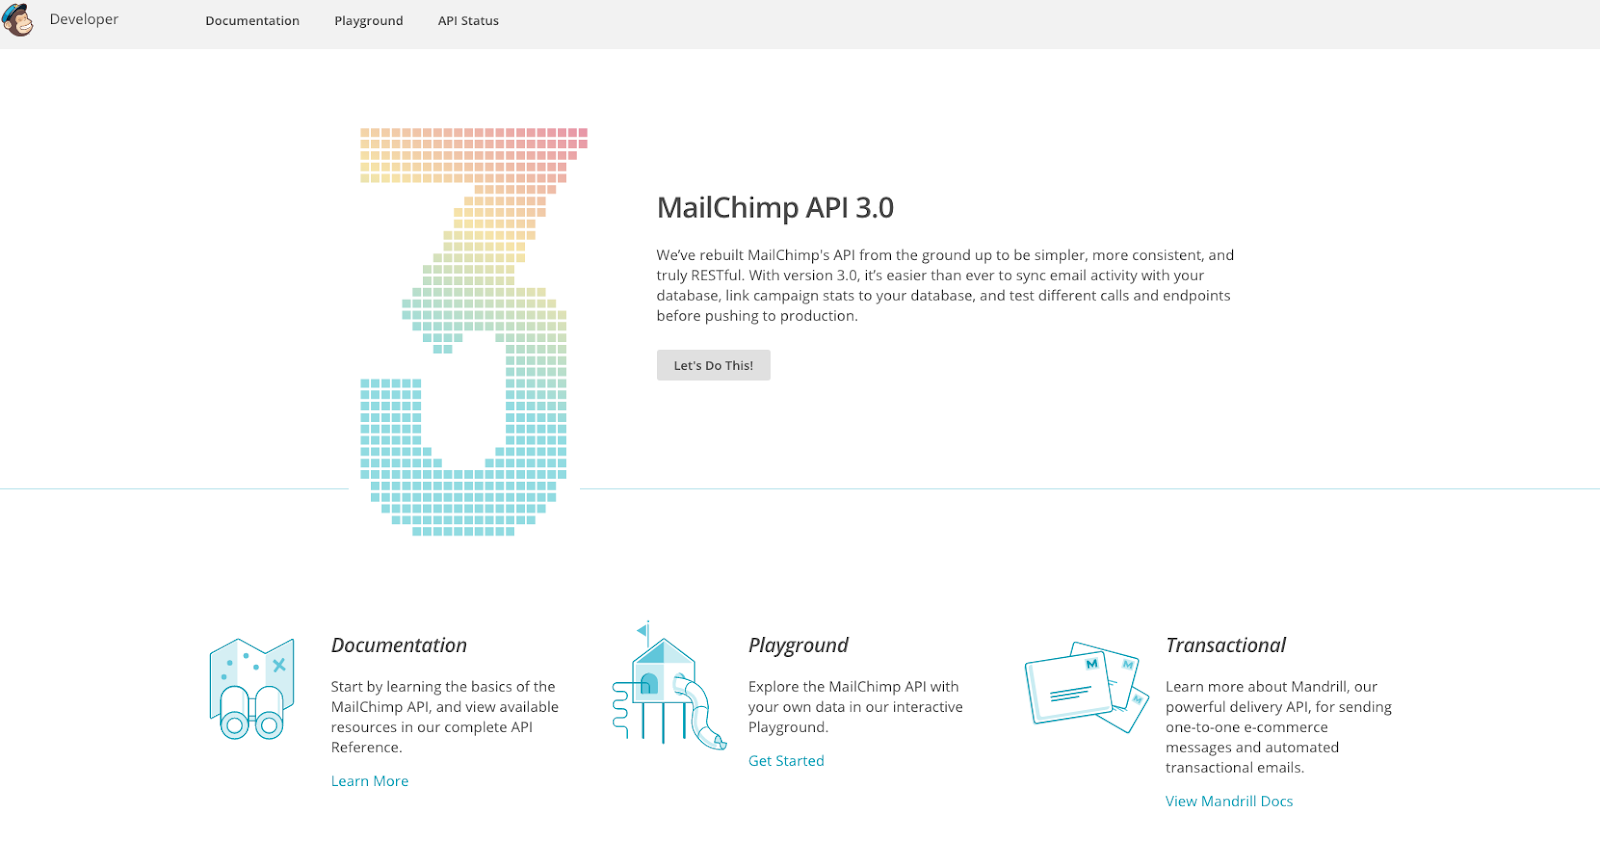
http://developer.mailchimp.com/documentation/mailchimp/reference/lists/
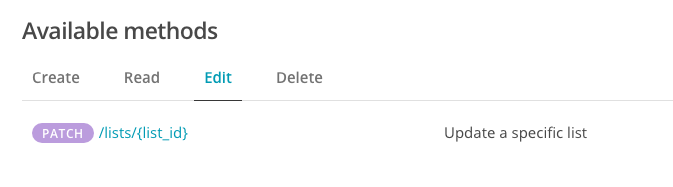
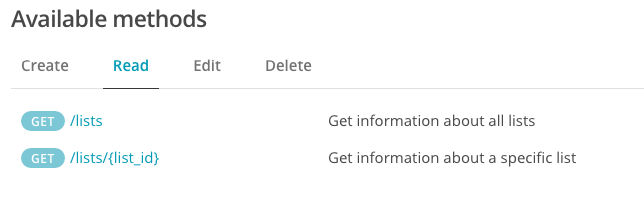
If you check the above link, it will show that there are routes available to read, create, update and delete list.

In our tests, we will focus on each method. In the next article, I will talk about the scenarios and how to use these route to write a few basic API Tests. I will show you first using Postman and then convert this script to C#.
Design a basic API Test Scenario.
Get Your API Key First:
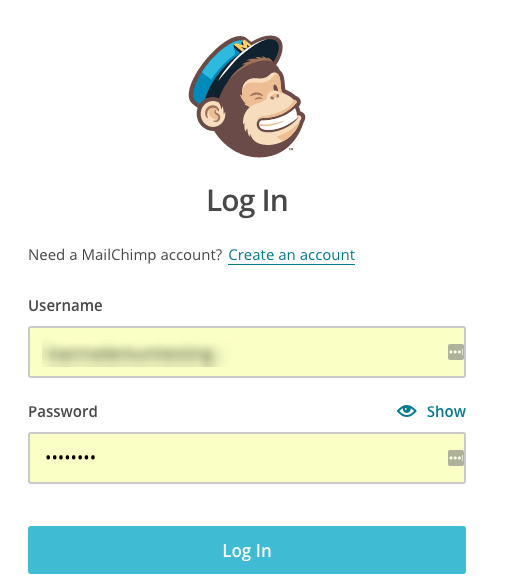
In this article, we will learn how to use MailChimp’s account and play with list route. If you do not have MailChimp account then please refer the previous article and create a new account. Log in to MailChimp using the credential
Once you are logged in, go to the top right corner and click on down arrow and click on Account link.

This will take you to the API Keys Homepage. Click on Create New API Key button.

This will generate a key as below. Keep the API key at a safe place. You are going to use this key in your code. I will remind you while coding, still, I want to warn you not to upload the code to GitHub with the original API key. This is a big NO-NO for security reasons. Do the same thing with your application too.

Design Basic API Test Scenario:
Let’s start working with scenarios. In this application, first, we need to create a list, add subscribers and then send emails. We will not go all the way to send emails but for just testing, we will do limit testing like;
- Verify that there is no list available as a brand new account. (GET)
- Create a list and verify if create route works. (POST/GET)
- Create a new list, rename the list and verify if rename works(POST/PUT/GET)
4. The clean account at the end of each scenario mentioned above(DEL) (as a cleanup task for point 2 and 3.)
Let’s start rolling.
If you are new to Testing in C# please go through my blog about NUnit Testing. In this blog, I will be using MSTest but the concept is very much the same as NUnit. Before jumping on code, I will show the test case using playground or PostMan, so you get an idea of what you need to do in code. I take the same approach when I am new to any technology.
Verify that there is no list available as a brand new account.
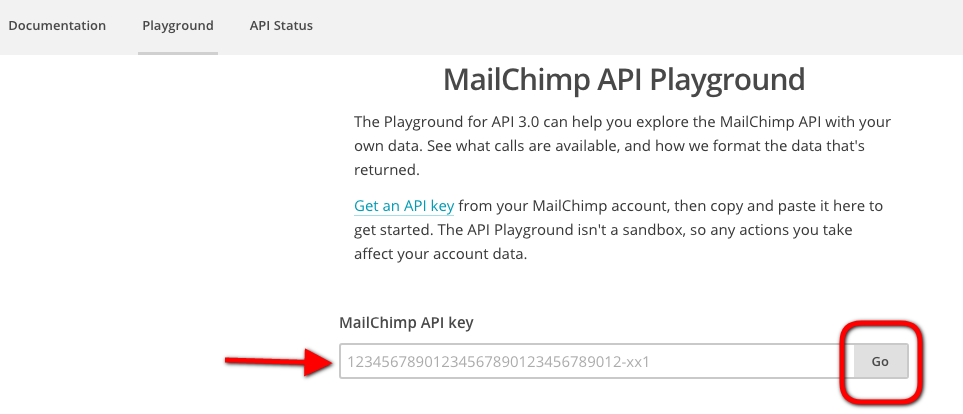
MailChimp has an awesome tool you can play with API, called “Playground”
https://us1.api.mailchimp.com/playground/
You just need to pass your MailChimp API Key generated in the last section and click Go
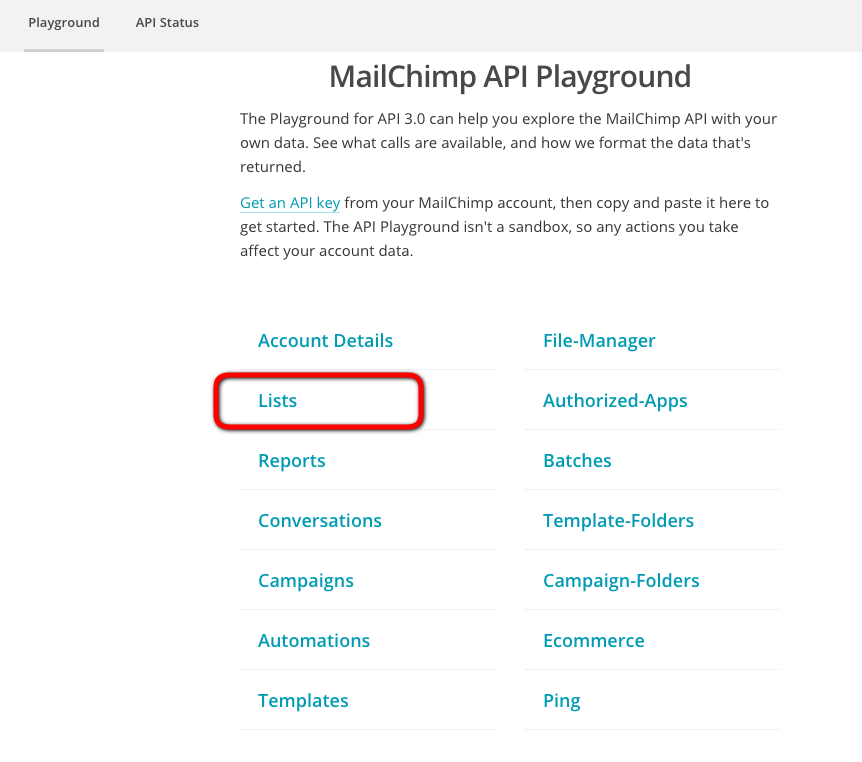
This will take you to MailChimp API Playground where you can play with all objects exposed via API but we will click on the list as we are testing these routes.
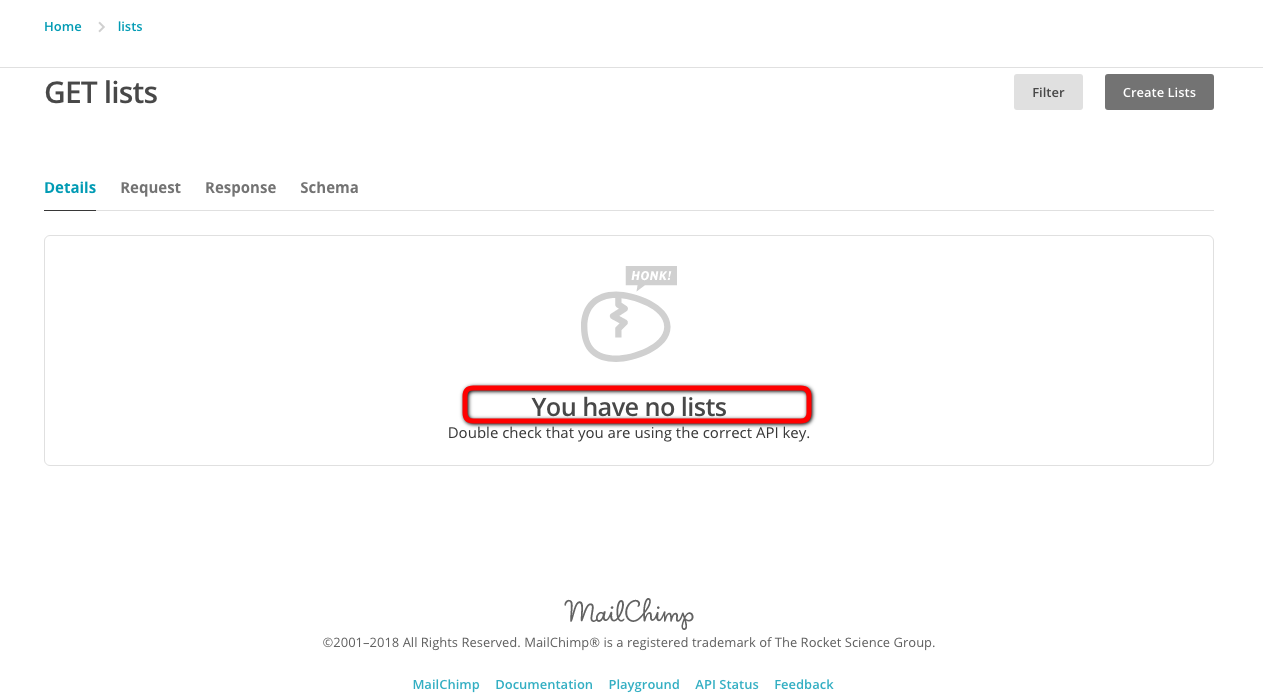
If you click on Response Tab
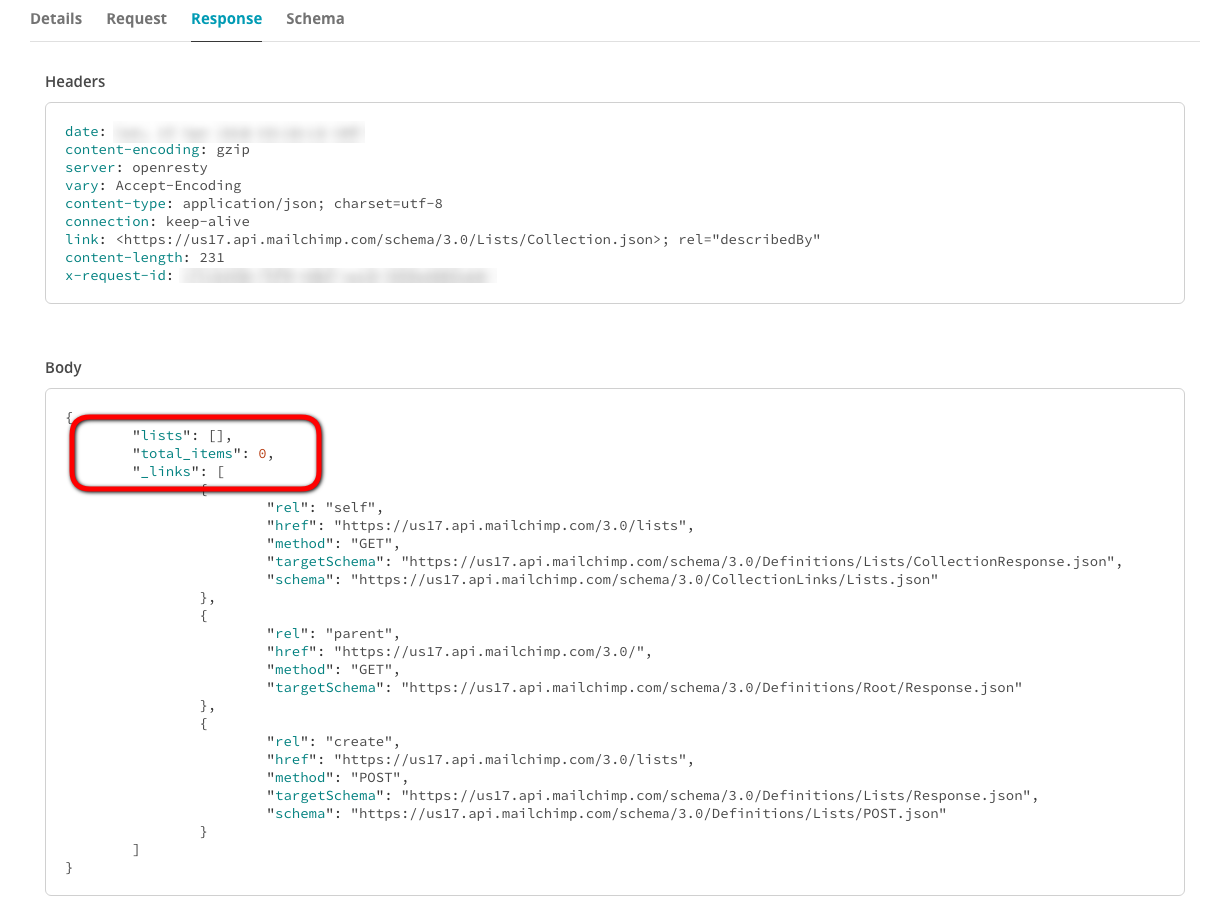
You can see the empty list. To get lists, we just call GET route to the endpoint of lists with basic authorization.
To test the route, you need mainly 3 information.
- Endpoint => “https://us17.api.mailchimp.com/3.0”
- Route => “/lists”
- Authorization => (basic <API_KEY>)
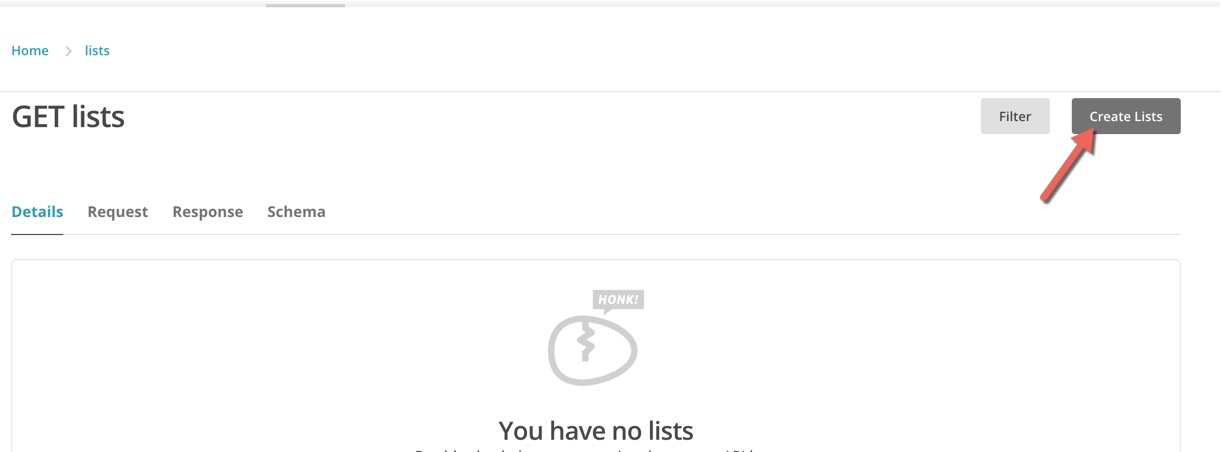
Create a list and verify if create route works. (POST/GET)
This time we will try PostMan. This will help us to learn a new tool and experiment at the same time. Click on the Create Lists Button.
This will show a dialog for the payload.
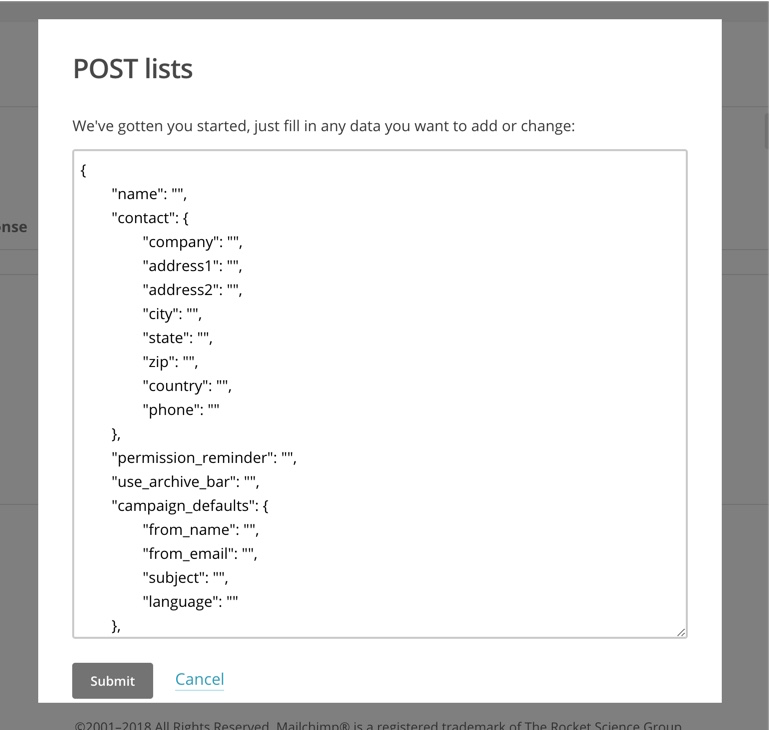
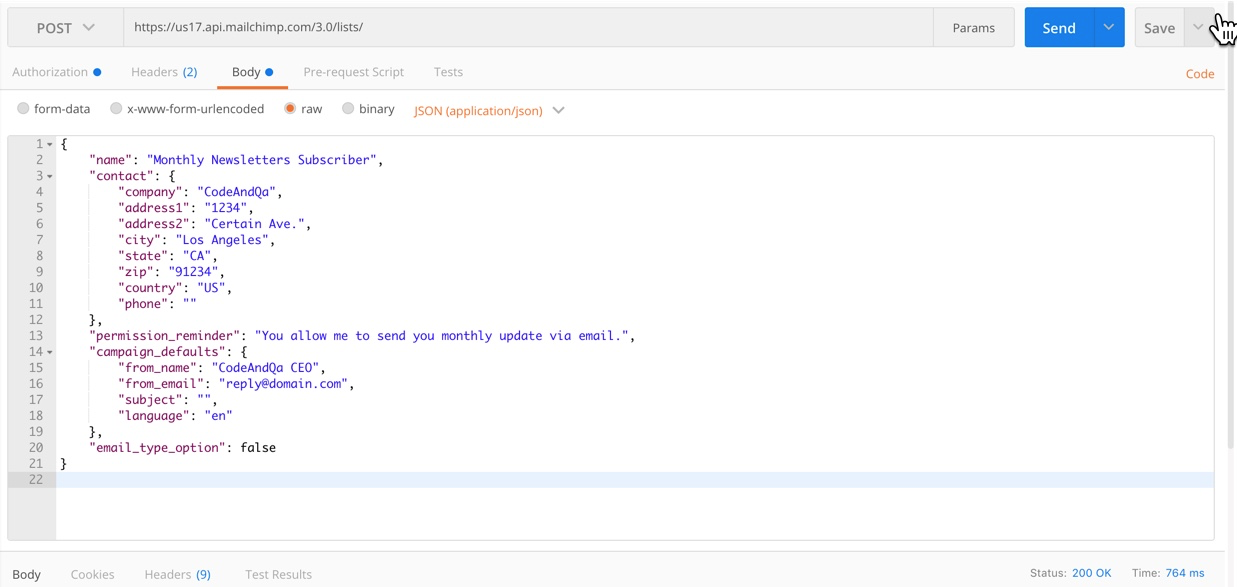
There are multiple fields that goes in payload but some are options but I will show you that are required at the time of this blog. Provide values to the required fields.
[gist id=”5cec26076cf1aa5c6a39bbe692313274″]
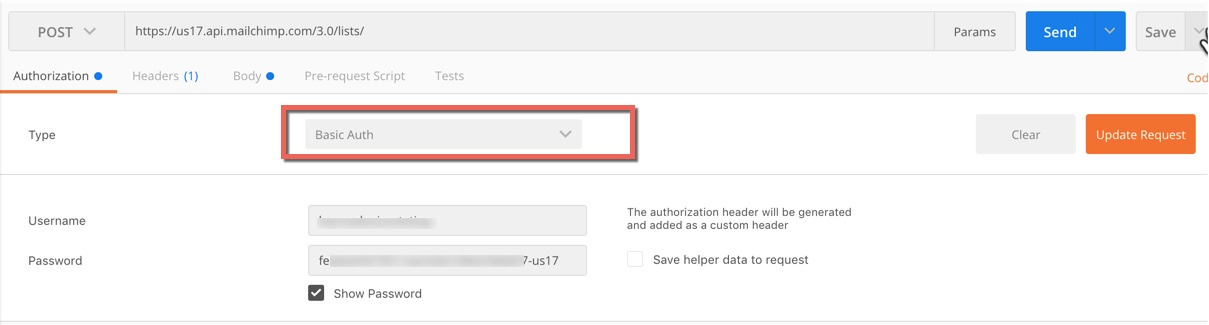
We need to post above payload via our Postman app. We need to take care of few logistics things we need to take care. We are using a basic authorization so we need to pass username of our mailchimps account and in place of passwords we need to provide API key.
Provide Body in JSON format
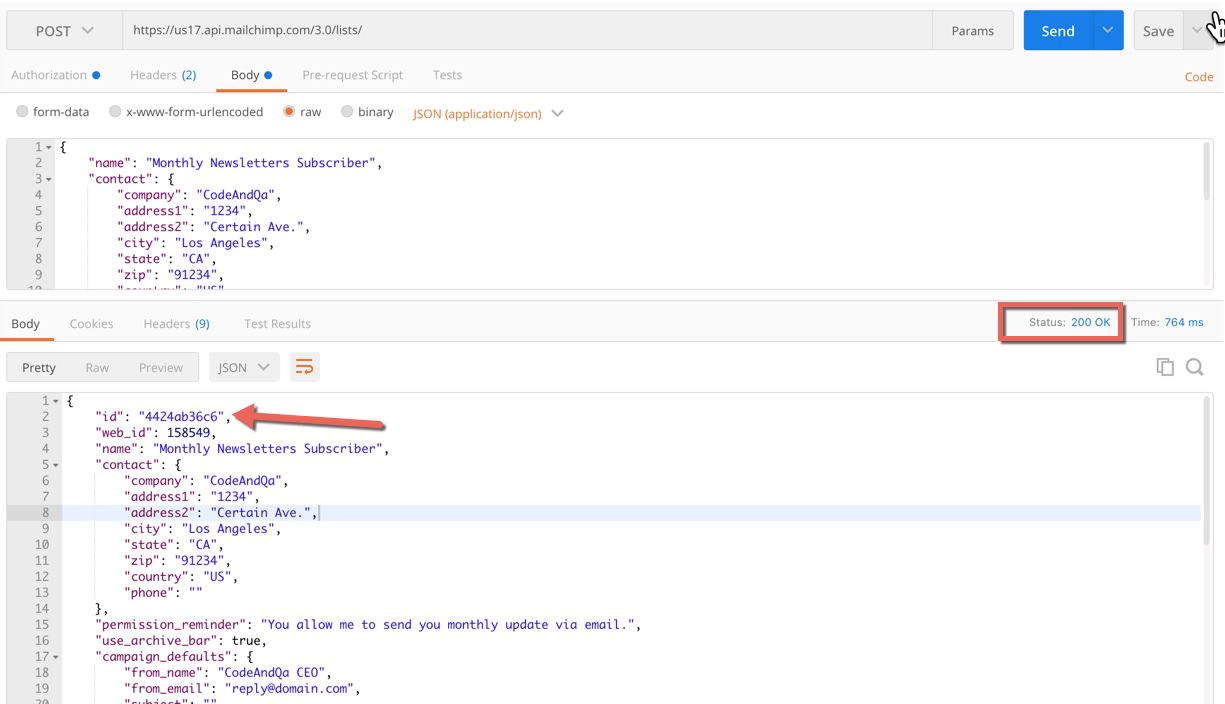
Once you click the Send button you’ll see the following response in the body
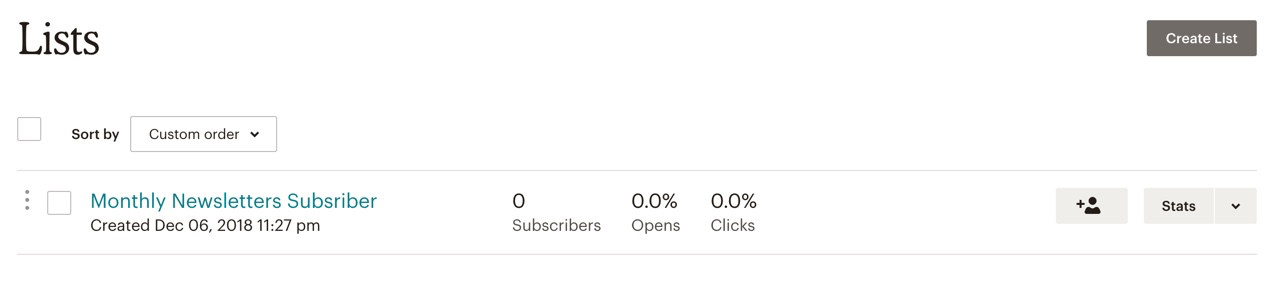
To verify in MailChimp UI, navigate to the MailChimp account and refresh the page https://us17.admin.mailchimp.com/lists/
You will see the following:
Now we are done with our first part that is POST and the second part is to check if the list has been created(GET)
In Postman use the same URL but just change action type to GET

You can see that response has one list and has the same ListID.
So here we were able to create a new list using API and then we verified that the same list has been created using the same API but calling GET route. in the last section of the blog, I will teach you how to do the same actions via code.
Create a new list, rename the list and verify if rename works(POST/PATCH/GET)
In this step, we are not going to create a new list as we have created in the previous step. This time I will update the same list with a new name and verify if the name has been changed.
let’s assume that you created a list with the same name as given in the previous step.
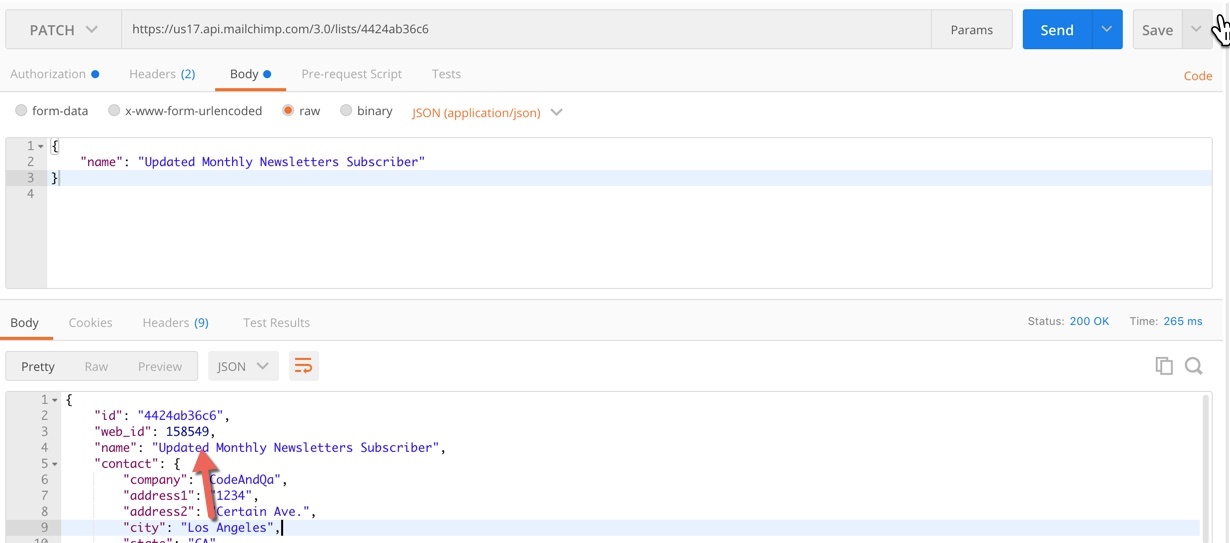
I got id: 4424ab36c6 and I will change the URL to
PATCH https://us17.api.mailchimp.com/3.0/lists/4424ab36c6
For the body:
{
“name”: “Updated Monthly Newsletters Subscriber”
}
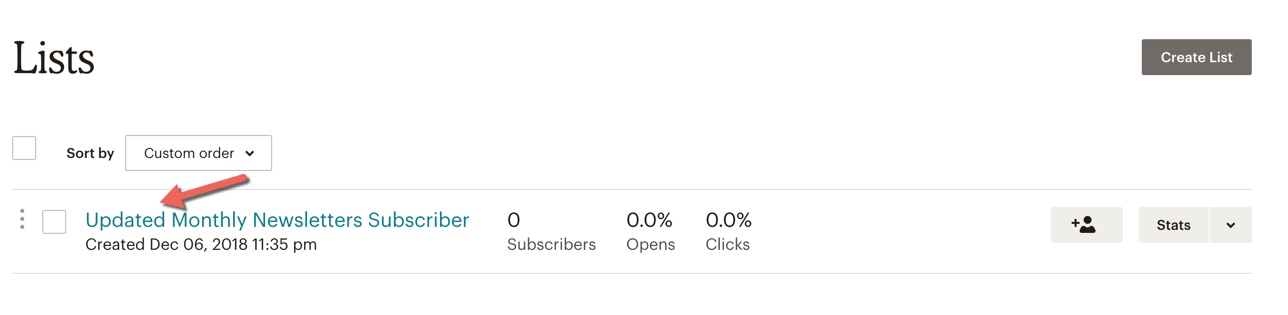
Verify the same thing via UI:
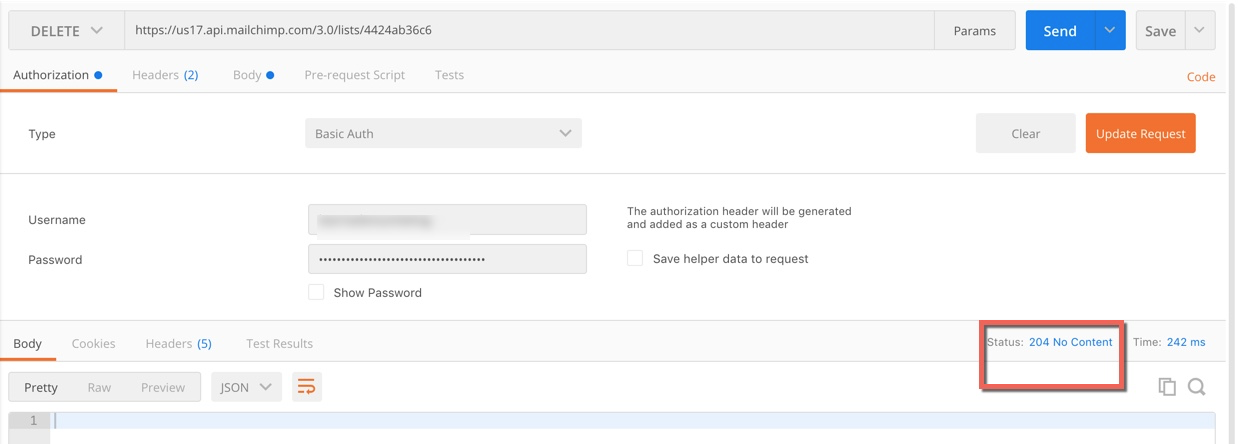
The clean account at the end of each scenario mentioned above(DEL) (as a cleanup task for point 2 and 3.)
Delete part is the easiest section where you just need to select the listing ID and run delete action.
Write Code for the above scenarios
In the previous section, we experimented with playground and view an empty list. You have not seen then please check that first. We will write three scenarios.
Verify that there is no list available as a brand new account.
[gist id=”51dd871c69f4d7ff1d55b8212729e99b”]
Create a list and verify if create route works.
[gist id=”4e72d4b07d29b4a7fe9674efab313d33″]
Create a list, rename the list and verify if rename works.
[gist id=”67e76efda46a77f9ac8a3f24a8c0dcc0″]
If you are interested to see entire code, please visit:
https://github.com/codeandqa/APITestingBlogExample
You can reference the above code and build your framework by creating the wrapper around verbs with custom requirement along with various error handling etc.